
Follow the below steps to set up Zendesk or Zopim Live Chat on your website running AIO Contact
- Login to your Zendesk account at yourdomain.zendesk.com
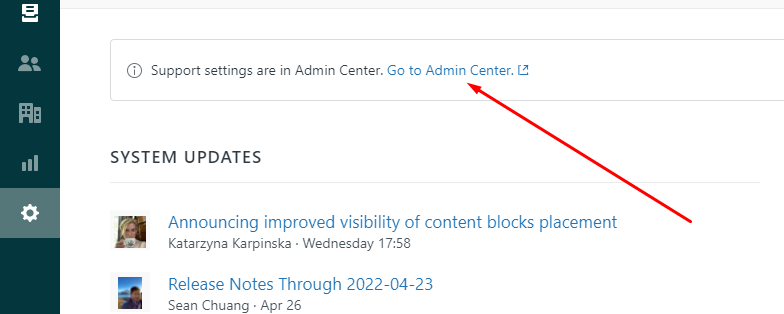
- Go to Admin from the Sidebar
- Click on `Go to Admin Center`
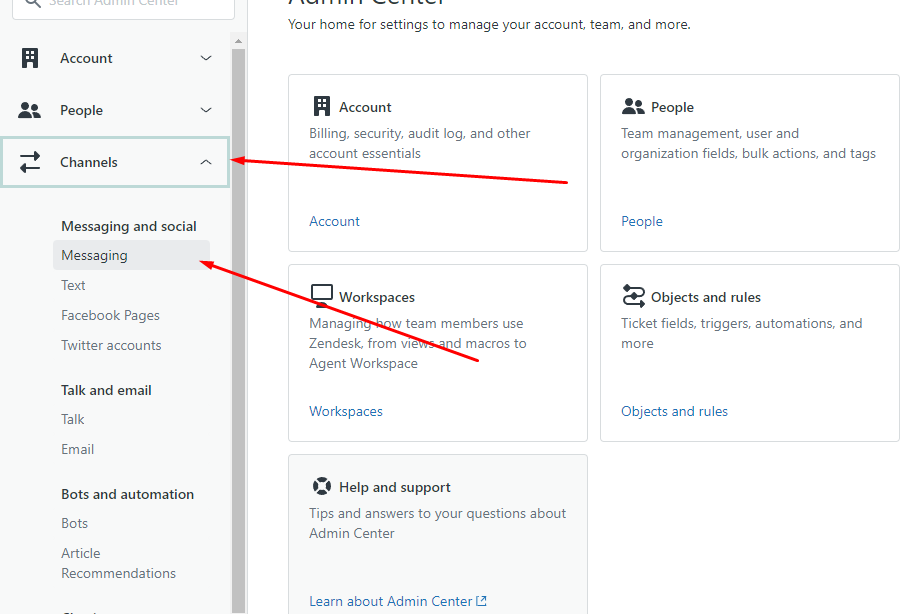
- Expand Channels and go to Messaging
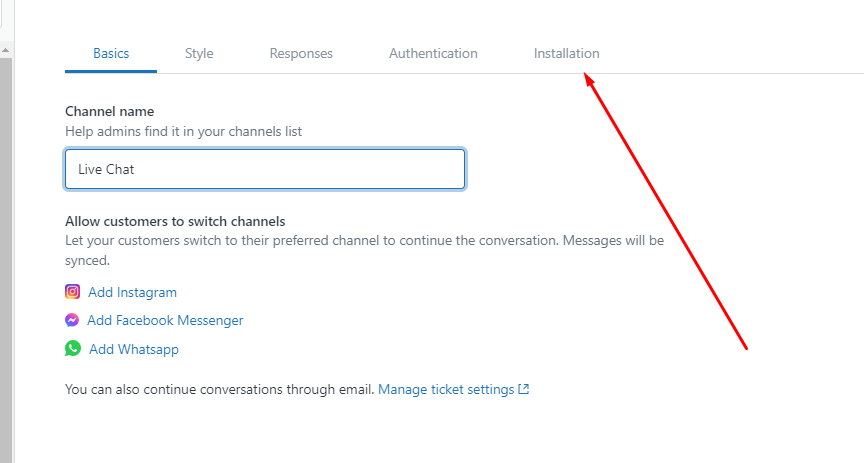
- Click on your Widget and go to the last tab of Installation
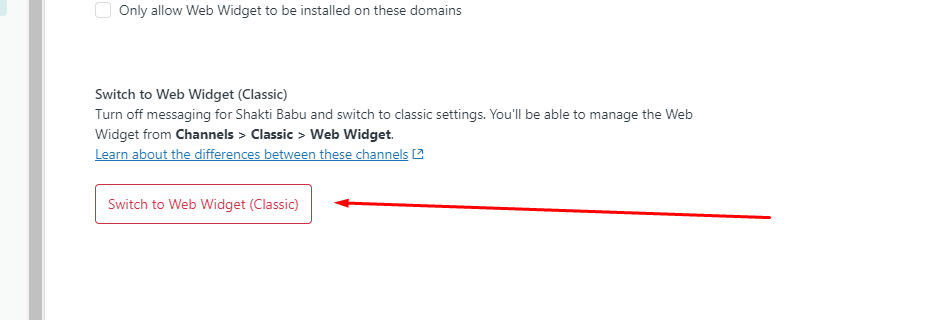
- Scroll down and click on the red button which says `Switch to Web Widget (Classic)`
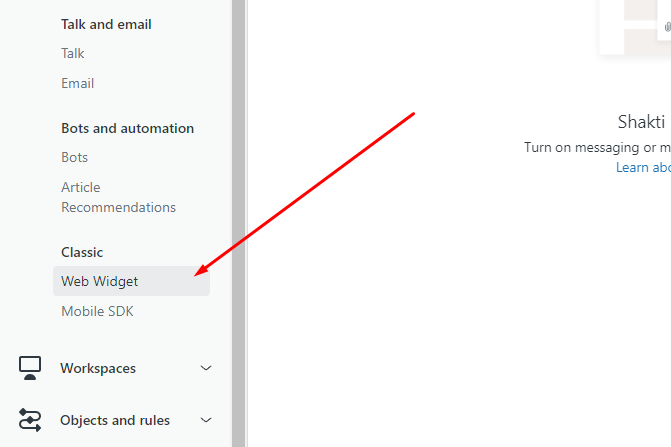
- Now, go to `Web Widget` under Classic
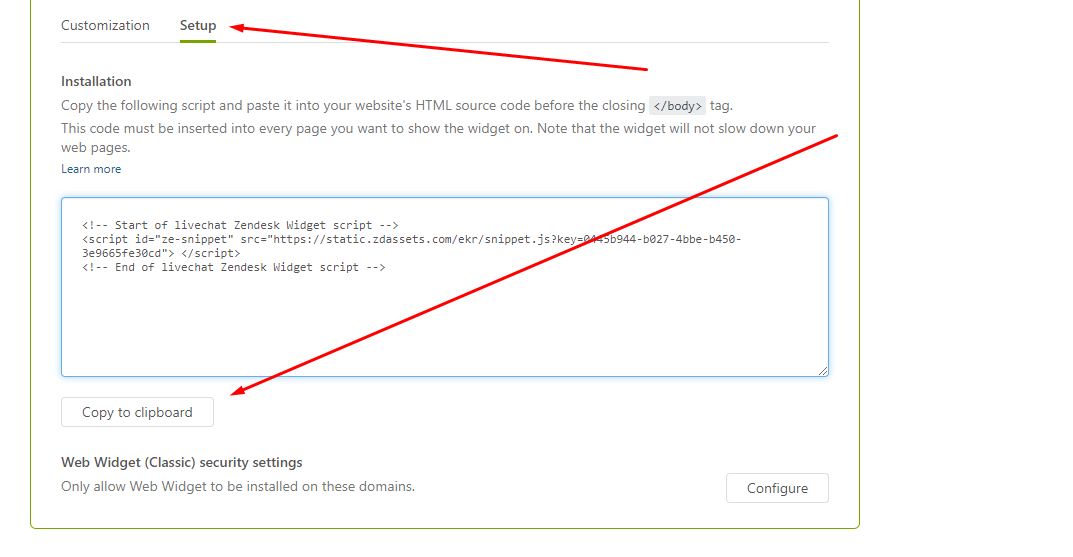
- Go to the second tab `Setup` and copy the Live Chat code
- Paste the copied code in the below box
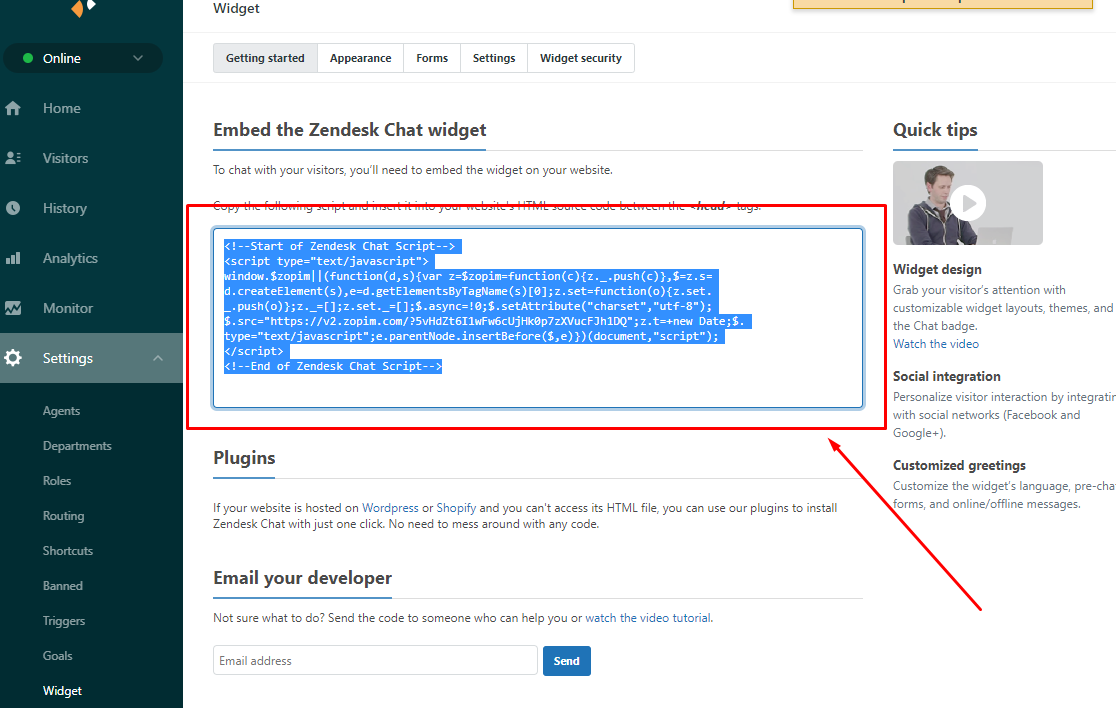
- Login to dashboard.zopim.com
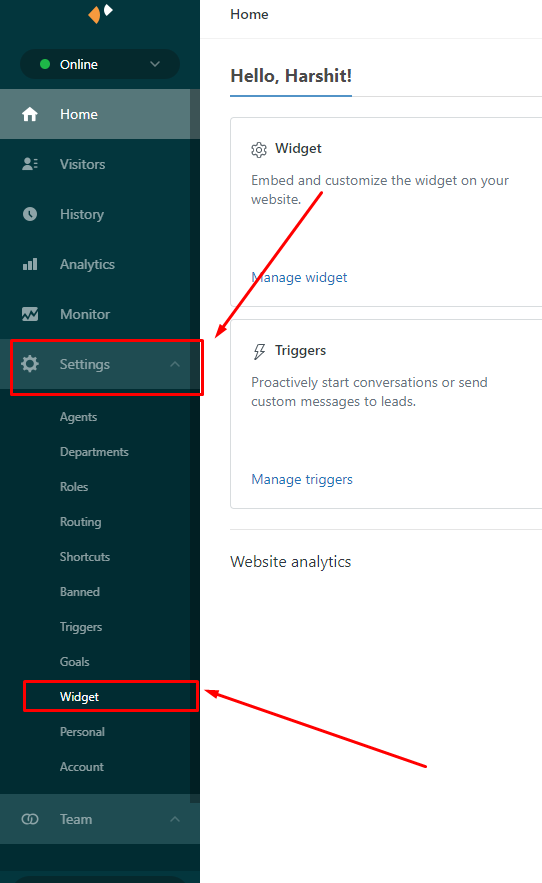
- Go to Settings -> Widget
- Copy the shown Code
- Now, visit your WordPress site where you've installed AIO Contact
- Login to the WP Admin Dashboard and visit AIO Contact Items Page
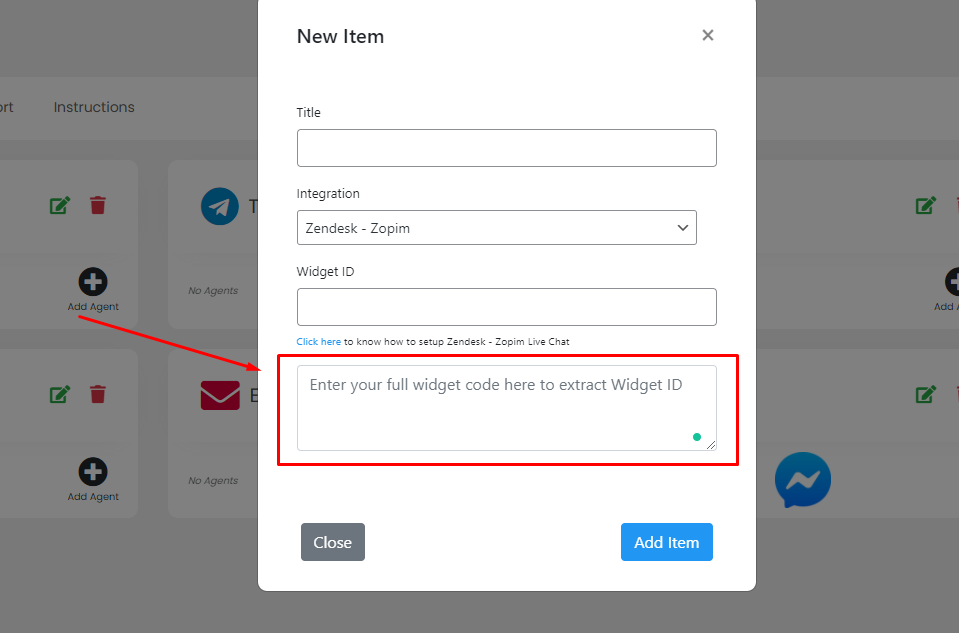
- Click on "Add Item" and select "Add Live Chat"
- From the dropdown, select "Zendesk - Zopim" and copy-paste the code in the textarea as shown below.
- System will automatically extract the widget ID for you and then just give it a name and click on "Add Item"